Invoices are the backbone of your accounts receivable. This is where you create detailed billing records, send them to customers, and track their journey from “Draft” all the way to “Paid.”
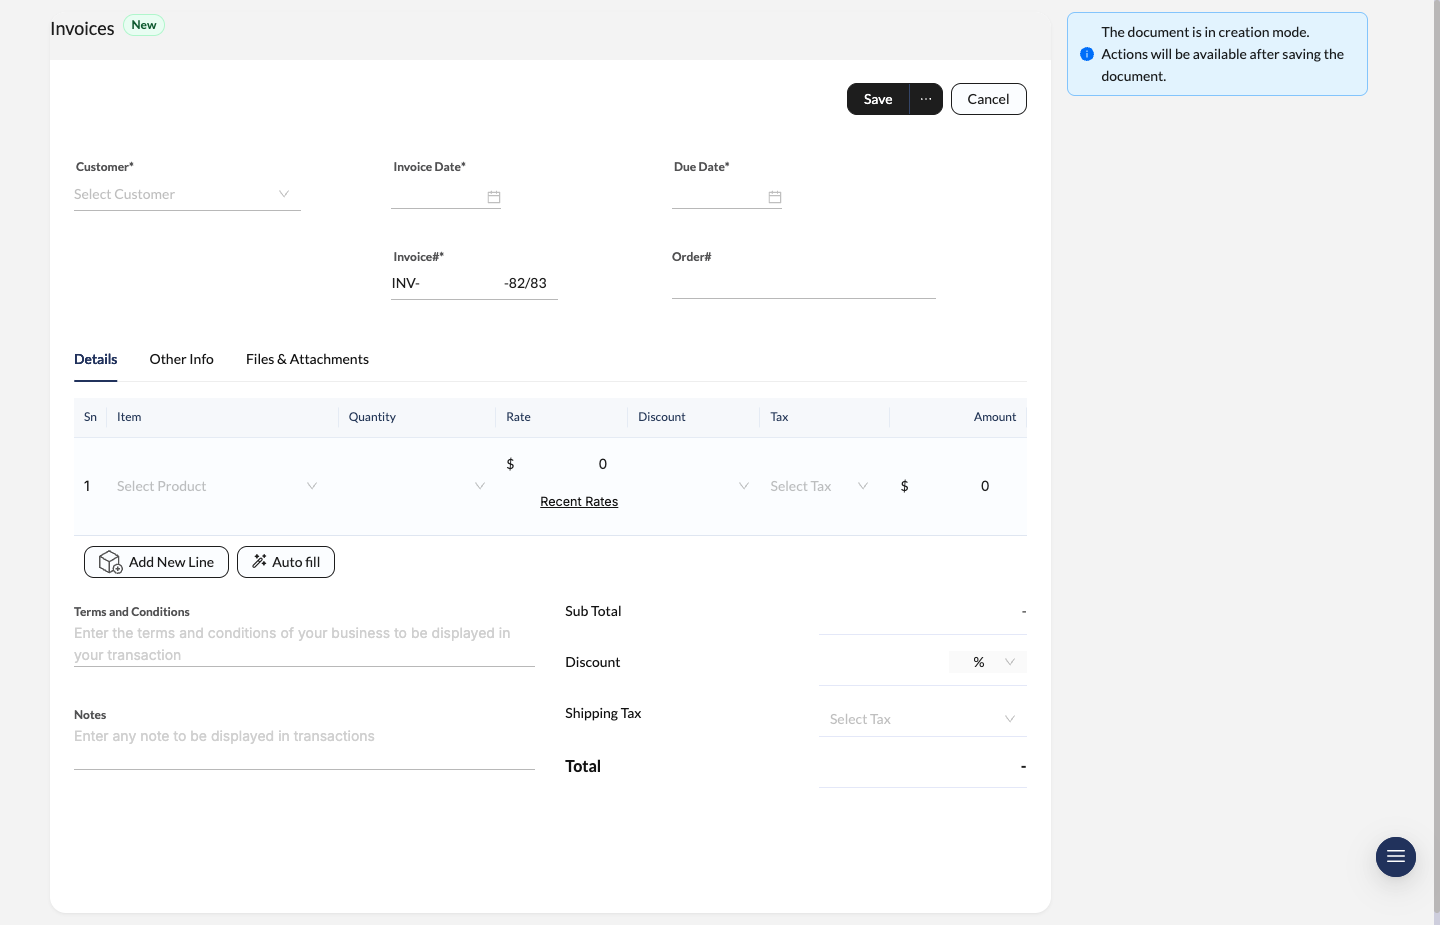
Invoice creation screen with customer details, invoice and due dates, line items, and auto-fill support.
Create a New Invoice
Initialize the invoice
Navigate to Invoices and click New.
Add customer details
Select a customer from the Customer dropdown. Set the Invoice Date and Due Date.
The system auto-generates an Invoice# (e.g., INV-216-82/83) based on your fiscal year settings. You can also enter an optional Order# for reference.
Add line items
Select a product from your inventory in the Item section. Adjust the Quantity and Rate.
- Recent Rates: Click the button under the rate field to see historical pricing for this specific customer.
- Add New Line: Add multiple products to a single invoice.
- Auto fill: Use this when converting from a Sales Order — it pulls everything over automatically.
Finalize and save
Enter any Terms and Conditions or Notes in the bottom-left area. Review the Sub Total and Total, then click Save.
Managing Invoice Details
Once saved, the invoice enters its lifecycle. Track progress using the status indicators and action bar.
Invoice Status
The status bar at the top right tells you exactly where things stand:
- Draft: Created but not finalized.
- Sent: Issued to the customer.
- Partially Paid: Deposit received, balance remains.
- Paid: Full balance collected.
- Overdue: Payment date has passed — time to follow up.
- Void: Invoice cancelled.
Header Actions
Quick management tools in the top-left action bar:
- Clone: Duplicate the invoice with identical details.
- Print: Download or print a PDF copy.
- Record Payment: Manually log a transaction.
- Delete: Remove the record (permissions apply).
Record Payments
Keep your accounts balanced by recording payments the moment they come in.
Manual Payment Entry
Open the invoice
Navigate to the invoice detail view.
Select Record Payment
Click Record Payment in the top action bar.
Enter details
Input the amount received and the payment date.
Save
Save the transaction. The invoice status updates automatically.
Quick Actions
In the right-hand sidebar, the Payments card shows the outstanding balance.
Tip: Click Pay all to record a full payment for the remaining balance in one click — no math required.
Handle Returns and Credits
Customer returning an item or requesting a refund on a paid invoice? Issue a Credit Note directly from the invoice view.
- Open the relevant invoice.
- Find the Credit Notes card in the right-hand sidebar.
- Choose your method:
- Manual: Create a custom credit note for a specific amount.
- Credit All: Auto-generate a credit note for the full value of the invoice items.
Approval Workflow
If an active approval policy exists for Invoices, save the invoice first, then use Request Approval.
- Pending invoices show an approval state instead of progressing normally
- Approvers can act from the document with Approve or Reject
- Rejected invoices can be edited and submitted again
You can configure the workflow in Approval Policies.