Purchase Orders
A Purchase Order (PO) is where your procurement journey begins. It’s the formal document you send to a vendor saying “here’s what we need, how much, and at what price.” In Sevenledger, Purchase Orders are the connective tissue between your inventory (shipments coming in) and your accounting (bills going out).
Like other modern ERPs, Sevenledger keeps the purchasing document separate from the physical stock movement. The Purchase Order confirms what you’re buying; the linked transfer/receipt handles what actually arrives at your warehouse.
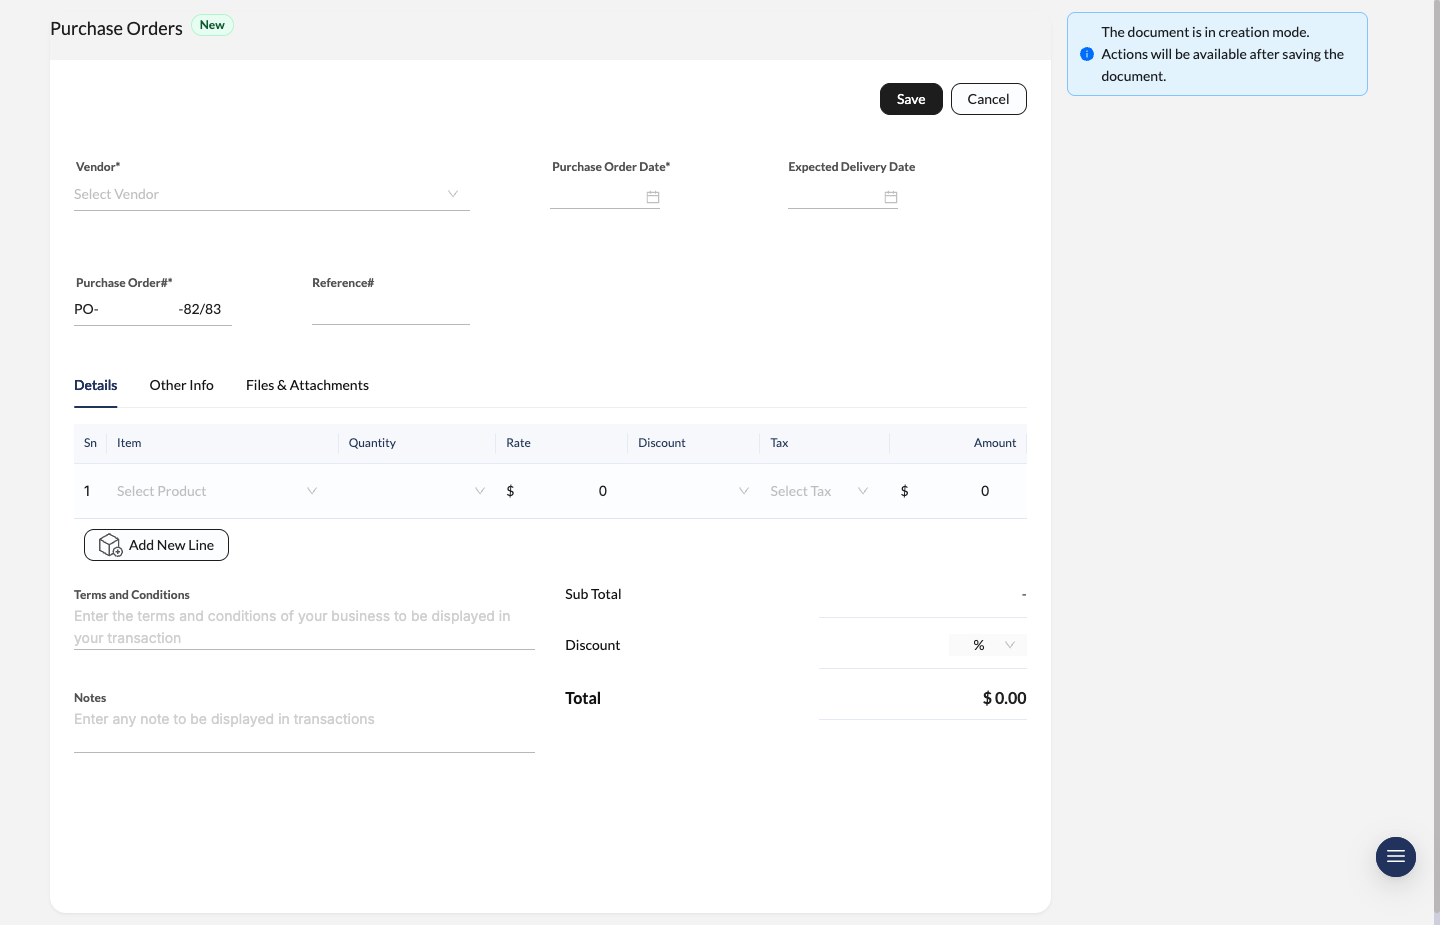
Purchase Order entry screen with vendor details, expected delivery date, line items, and totals.
Creating a Purchase Order
Navigate to Purchase Orders and click New to get started.
Vendor & Date Details
Pick the Vendor you’re ordering from.
- Purchase Order Date: When the order is issued (supports Nepali date format, e.g., 2082-09-11).
- Expected Delivery Date: When you expect the stock to arrive at your warehouse.
Order References
- Purchase Order#: Sevenledger auto-generates a unique ID (e.g.,
PO-2-82/83), but you can manually edit it if needed. - Reference#: Use this for external references — like a vendor’s quotation number for easy cross-referencing.
Adding Items
Build your order in the items table:
- Item: Select the product name or SKU.
- Quantity: How many units you’re ordering.
- Rate: Unit cost.
- Discount & Tax: Apply line-item discounts (%) or select a tax rule (e.g., VAT).
Footer Details
- Terms and Conditions: Add payment terms or special instructions that’ll appear on the printed document.
- Notes: Internal notes for your team’s reference.
- Total: Review Sub Total, Discount, and Final Total before you hit save.
Management & Operations
Once you save a PO, you’re taken to the management view — a real-time dashboard for that specific order with a sidebar for executing fulfillment and billing actions.
The Status Bar
The status bar at the top gives you instant visual feedback on where the order stands:
- Draft: Created but not confirmed yet — still editable.
- Open: Confirmed and active. May have received partial shipments but isn’t fully complete (Highlighted in Blue).
- In Progress: Action is happening — partially billed or partially shipped.
- Completed: All goods received AND all bills created. You’re done! (Highlighted in Green).
- Cancelled: Order was voided before completion.
Right Sidebar Operations
The sidebar is your command center for this PO. Manage the flow of goods and money without ever leaving the screen.
1. Documents vs. Activities
Toggle between two views at the top of the sidebar:
- Documents: The default — shows Shipments, Bills, and Payments.
- Activities: A timeline of every action taken on this order (look for the notification badge).
2. Shipments (Inventory)
This is where you control stock intake.
- Tracking: See all related warehouse receipts (e.g.,
WH/IN-112-82/83) and their status:- RECEIVED: Stock has been added to your inventory count.
- CANCELLED: The receipt was voided.
- Actions:
- Receive All: Instantly creates a “Goods Received Note” for every outstanding item.
- Manual: Need to receive a partial quantity? (e.g., 50 out of 100 items arrived) — this is the option for you.
Use Transfers for Receipts and Returns
For inventory-tracked items, use the linked shipment/transfer flow to receive stock against the PO. That’s the record that updates on-hand inventory and keeps the warehouse side accurate.
If you send items back to the vendor after receipt, open the related transfer and use Create Return. This creates a return transfer tied to the original movement, which is the correct way to reverse stock movement instead of editing the original receipt.
If the vendor also owes you money, a replacement credit, or an offset against future bills, record that separately with a Vendor Credit. In short:
- Transfer / Return Transfer: physical stock receipt or stock sent back
- Vendor Credit: financial credit or refund from the vendor
3. Bills (Accounting)
This section handles the financial side.
- Create Bill: If no bills exist yet, you’ll see:
- Bill all: Auto-generate a vendor bill for the full PO amount.
- Manual: Create a bill for specific items only.
- Existing Bills: Once created, bills appear in a list (e.g.,
BI-23-82/83) showing the billed amount. Need to remove one? Use the trash icon.
4. Payments
Once bills are generated, a Payments section appears in the sidebar.
- Summary: Shows the total outstanding (e.g., “Rs 33,890.00 to Pay”).
- Pay All: One-click to initiate payment for all linked bills at once.
Good to know: A Purchase Order can stay “Open” even after shipments are received, as long as billing isn’t fully complete yet.
Approval Workflow
If an approval policy is active for Purchase Orders, users must save the PO and then use Request Approval.
- the approval flow shows the current step and status,
- approvers can Approve or Reject directly from the document,
- rejected purchase orders can be edited and sent back through the workflow.
Set up these rules in Approval Policies.